Deploy A More Secure Rails App on AWS(ElasticBeanStalk, VPC, NAT gateway, Bastion Host) - Part 2
The goal of this post is to understand why and how to deploy a secure web app(rails app in this case) on AWS.
- Start a simple rails application with ElasticBeanStalk.
- Create a RDS instance
- Start a Bastion host
- Create database in the RDS instance via Bastion host
- Deploy app via ElasticBeanStalk
Create a simple rails app with ElasticBeanStalk
Go to ElasticBeanStalk, create a new application, for now, I will just use the sample ruby rails app
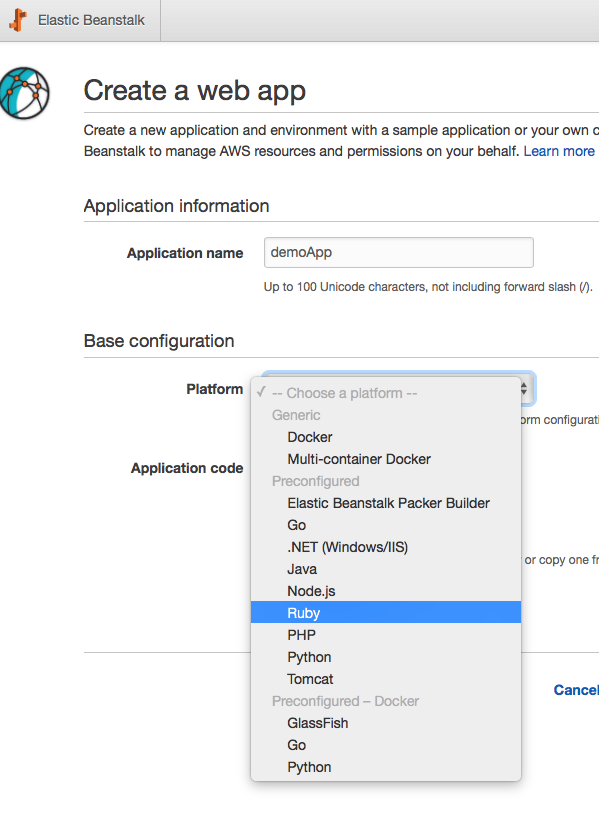
Before you create the new app, click on ‘configure more options’ , one thing to note is that, if you are using the low cost presets, you can’t configure capacity and load balancer options, in this example, we want to add a load balancer for scaling (i won’t get into the detail of setting up load balancer here, use the default here, just want to show that you can configure it here too)
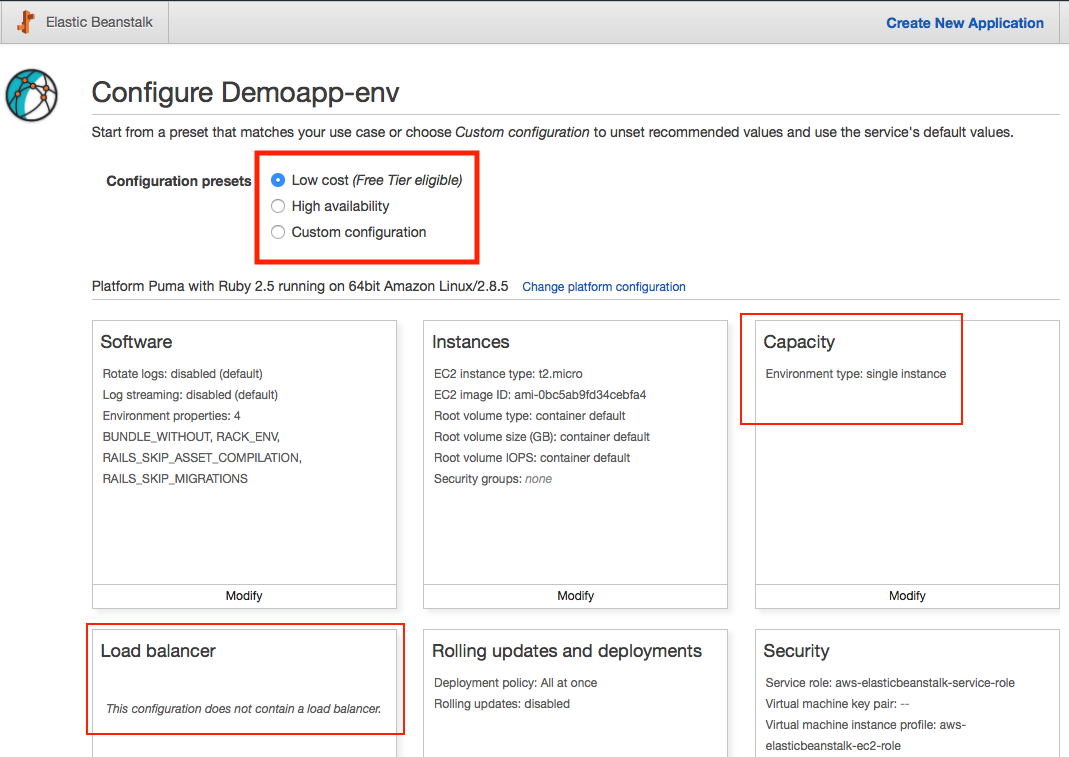

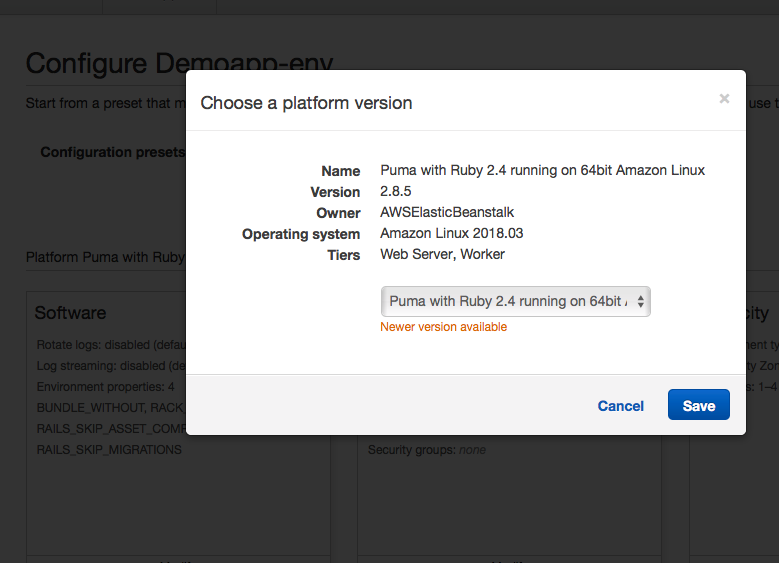
Note that you can change the platform setting such as ruby version, make sure the app will be initiated with the right ruby version. Otherwise you might see rails package installations issues(such as this one).
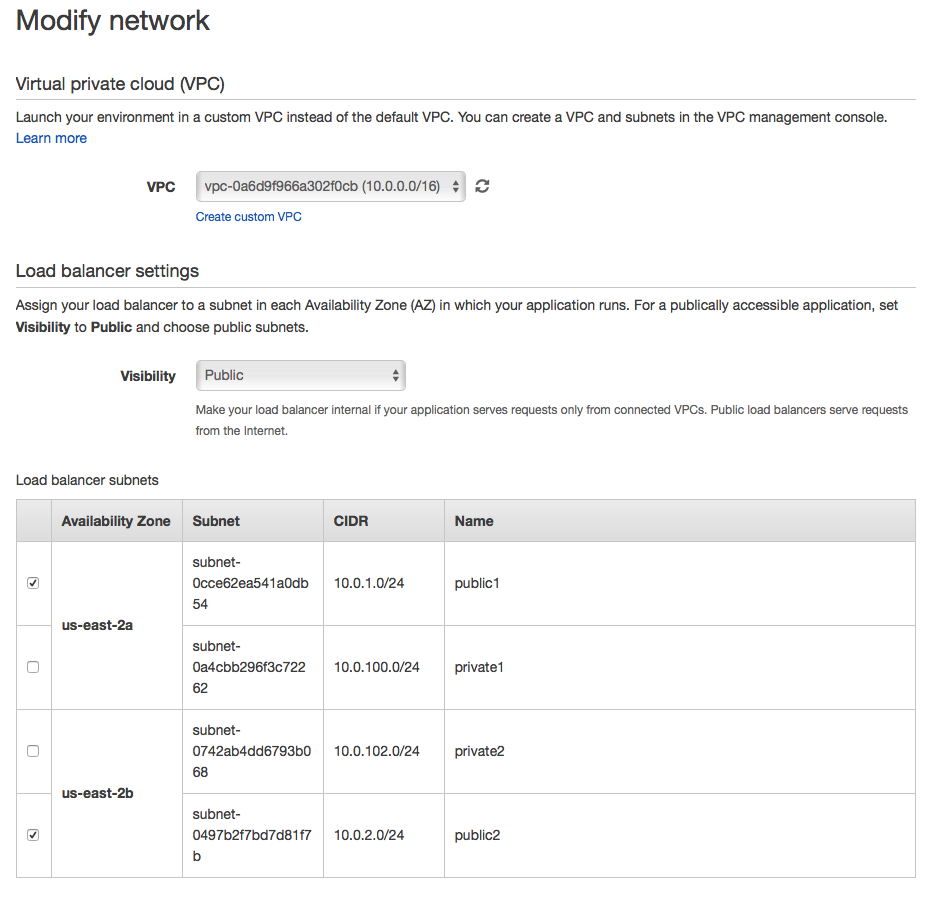
You can change the configuration in the ‘network’ tab: select the new VPC, assign public subnet to the load balancer, select private subnet in instance settings.
Click the ‘instances’ tab, update the EC2 security group to ‘Web Server’.
We will set up database separately so no need to change database config here.
when the app is created successfully, click on the link you should see a welcome page.
Create the RDS instances
Since we are using postgresql, we will create a new RDS instance in the private subnet of the new VPC.
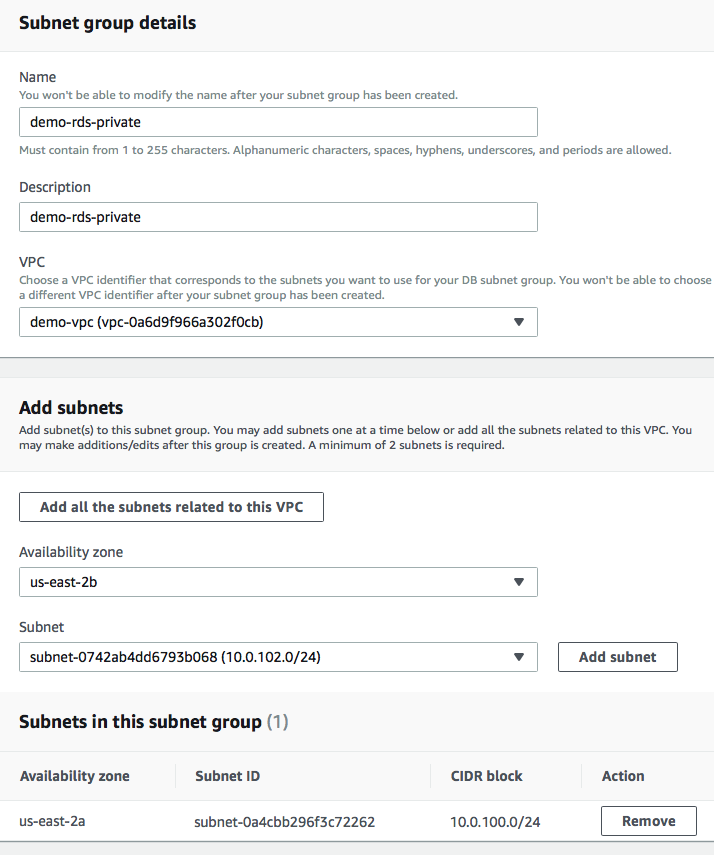
Step 1: Go to RDS dashboard, click ‘subnet groups’ on the left nav, create a private subnet group:
Step 2: Launch a new instance(you can click only show free tier to avoid potential costs), select postgresql version, give it an instance name and user credential. Go to advanced settings. Here select the VPC we created(demo-vpc), choose a private subnet group, select the databse security groups we created earlier, select no for public accessibility since it’s not secure to allow public access to the database.
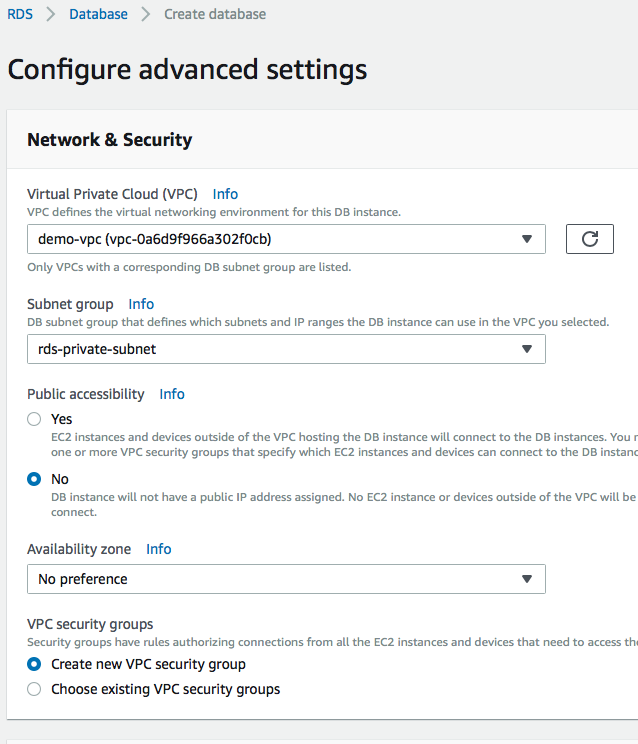
Type in a database name, and leave the rest as default.
Once the instance is up and running, you should be able to see a endpoint of this instance on the instance description tab, we will use this endpoint soon.
Start A Bastion Host
Once the RDS instance status turns into available, let’s create a Bastion server.
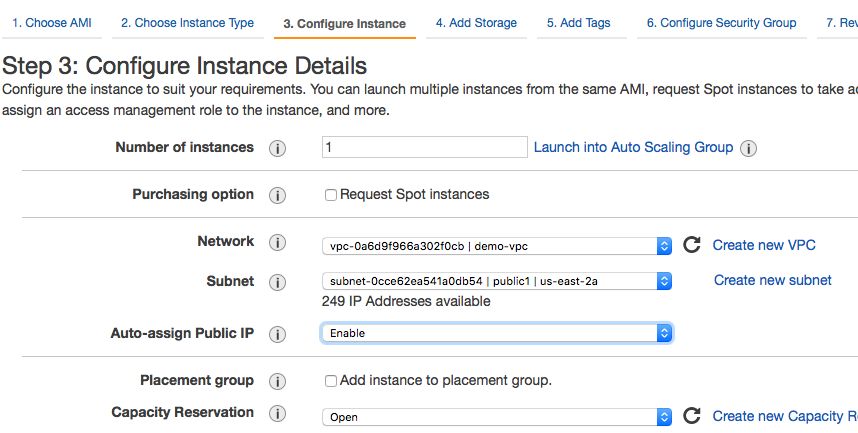
Go to EC2 page, create a new ec2 instance under the same VPC with a public subnet, enable public IP address
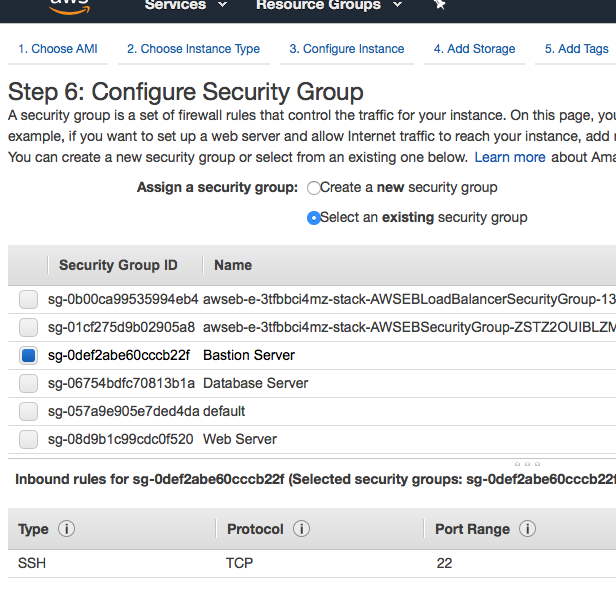
in the configure security group, select the bastion server security group
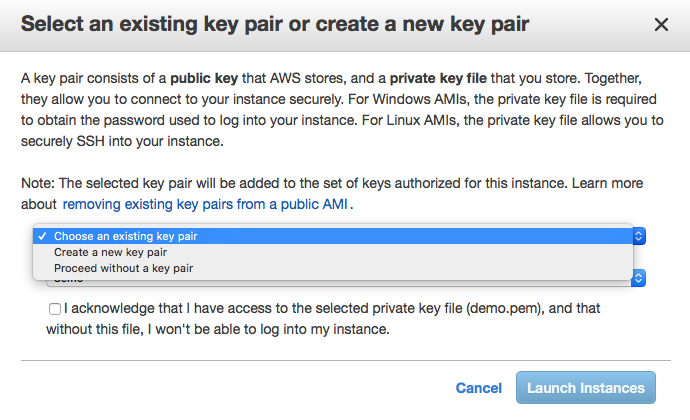
Before starting the instance, it will ask you about key pairs, if you don’t have existing key pairs it will generate one and download the pem file, if you already have one, you can use the existing pair. We will need this to ssh into the instance.
Now let’s ssh into the bastion server with the public IP address (using the key pair), such as:
ssh -i ./demo.pem ec2-user@XX.XXX.XX.XX
it will give you a hint to sudo yum update, then let’s install postgres with sudo yum install postgresql95.
Create database in the RDS instance via Bastion host
Now since we are in the bastion host, we have access to the private subnet, let’s connect to the RDS instance:
psql -h [HOST] -U [USERNAME] -d postgres
Now we can setup users and databases source here
CREATE ROLE dev with encrypted password '[STRONG_PASSWORD1]' LOGIN;
GRANT dev TO [MASTER_USERNAME];
CREATE ROLE prod with encrypted password '[STRONG_PASSWORD2]' LOGIN;
GRANT prod TO [MASTER_USERNAME];
CREATE DATABASE dev with owner dev;
CREATE DATABASE prod with owner prod;
Deploy app via ElasticBeanStalk
let’s create a new rails app(check your ruby version before you create the new app) with rails new MyApp --database postgresql, open the config/database.yml file to the production section, as mentioned in the comment, we can use a URL with this syntax postgres://myuser:mypass@localhost/somedatabase to connect with the database.
Now let’s go the the app in ElasticBeanStalk, click on configuration - software, add two new environment properties:
DATABASE_URL: postgres://myuser:mypass@localhost/somedatabase
SECRET_KEY_BASE: (get this by running rails secret in the code)
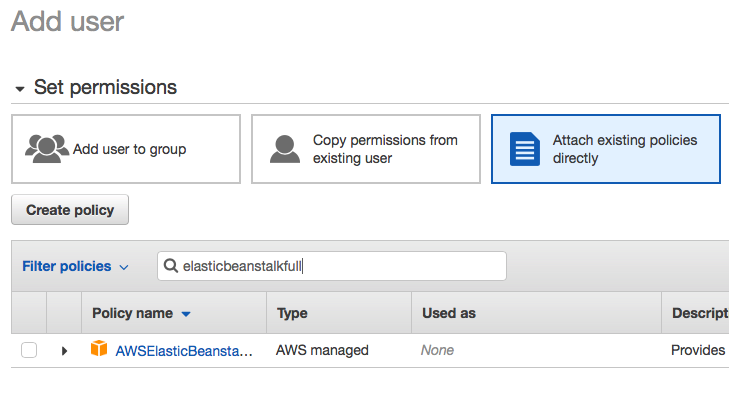
Create a ElasticBeanStalk user role in IAM with ElasticBeanStalkFullAccess Policy attached
create a new aws profile with aws configure --profile demo
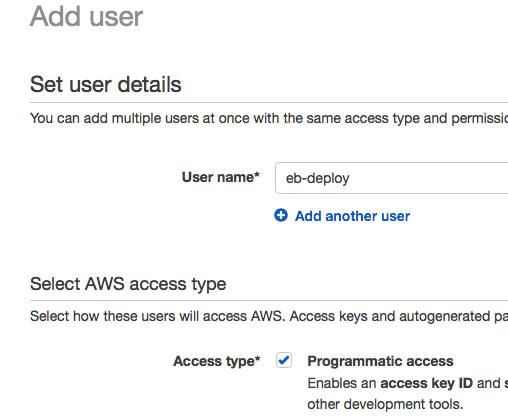
you can add this user to a group has ElasticBeanStalk deploy permission, but here just attach the existing policy ElasticBeanStalkFullAccess to the user
Use ElasticBeanStalk CLI
Install it with brew install aws-elasticbeanstalk
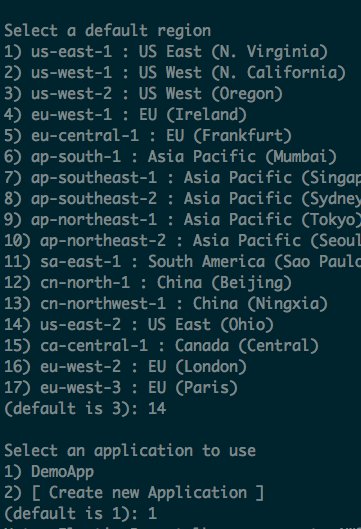
Init with eb eb init --profile demo, it will ask you a few questions, remember to select the correct region, otherwise it cannot find the right application
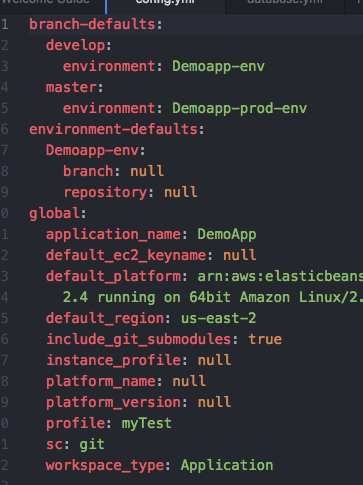
Edit ElasticBeanStalk config files
After the previous step, there should be a new config file in the .elasticbeanstalk folder, in that file you can also specify another branch such as master branch to deploy to production env. So when you are on master branch, use eb deploy --profile demo will deploy it to production env. But you will need to have a prod env in ElasticBeanStalk first.
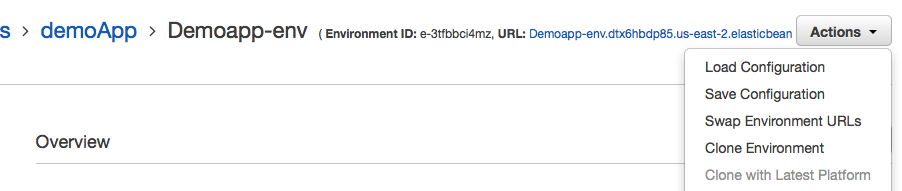
The quick way to do it is to clone the existing env, but change the environment property, such as using the prod database and the prod user for postgresql
Links: