Deploy A More Secure Rails App on AWS(ElasticBeanStalk, VPC, NAT gateway, Bastion Host) - Part 1
The goal of this post is to understand why and how to deploy a secure web app(rails app in this case) on AWS.
Basic Understanding of VPC
Why VPC? VPC lets you provision a logically isolated section of the AWS Cloud where you can launch AWS resources in a virtual network that you define, it provides advanced security features, such as security groups and network access control lists, to enable inbound and outbound filtering at the instance level and subnet level.
There is one VPC as the main VPC by default, How to setup a new VPC? There are some key components in a VPC, including:
- Internet gateway
- Route Table
- Subnet
Here is a simple diagram to understand the basic of how these components work:
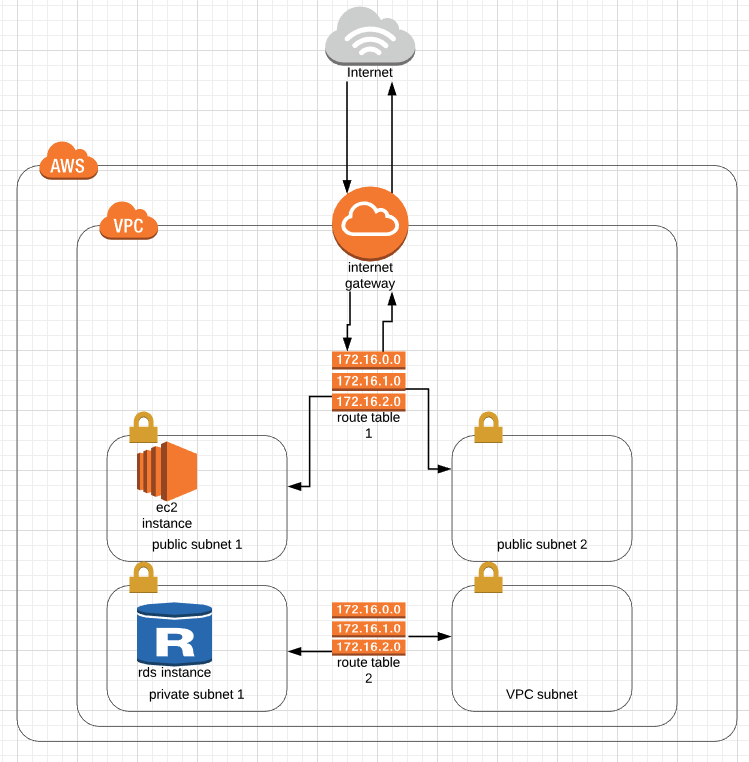
To connect to the open internet, one VPC must have (and can only have) one Internet Gateway attached to the VPC. The route table is used to determine where network traffic is directed, you can have multiple route tables in one VPC. Subnet is short for subnetwork is a sub section of a network, you can decide whether you want a subnet to be public accessible or not by associate them with different route tables.
- Network Access Control List (NACL)
- Availability Zones
NACL is an optional layer of security for the VPC, it acts like a firewall for controlling traffic in and out of one or more subnets, note that NACL works on subnet level.
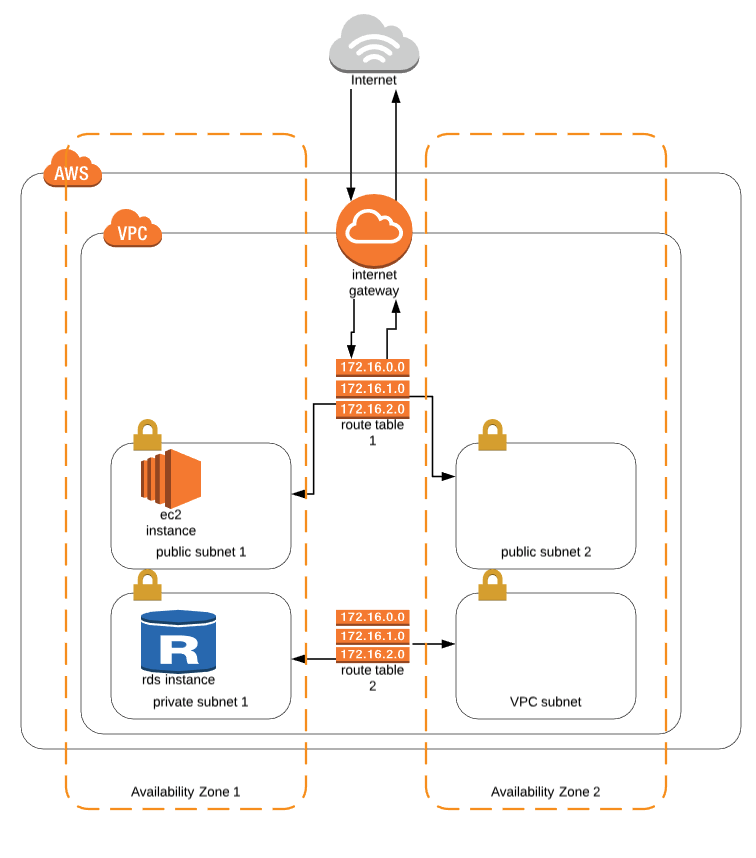
When you create a VPC, it spans all of the availability zones in the region, you can add one or more subnets in each availability zone. Each subnet must reside entirely within one availability zone and cannot span zones.
The benefit of utilizing multiple availability zones is to allow high availability and fault tolerant systems.
- NAT Gateway
- Bastion Host
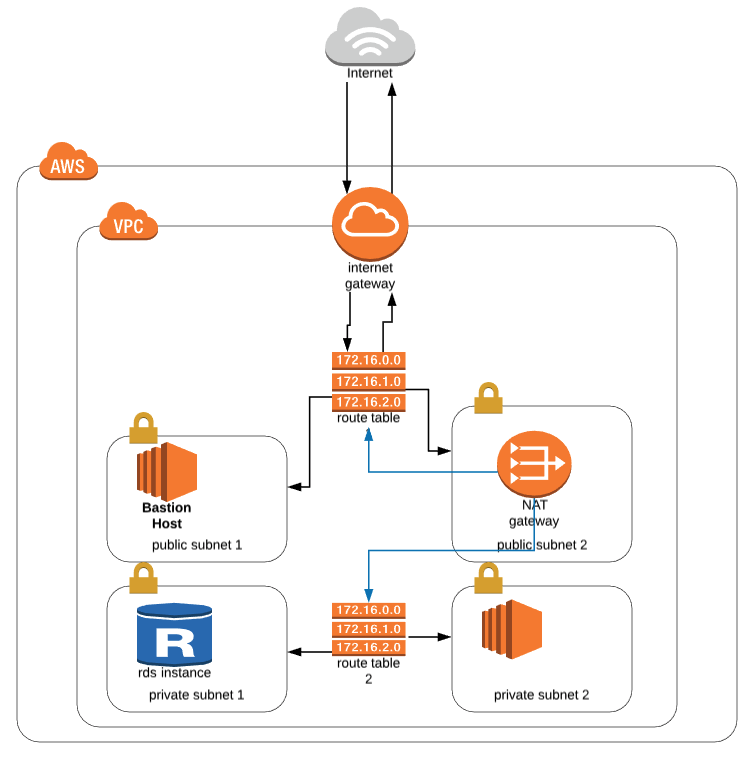
You can use a network address translation (NAT) gateway to enable instances in a private subnet to connect to the internet or other AWS services, but prevent the internet from initiating a connection with those instances. This is often used when the private subnet instance needs to install/update software/packages
Bastion hosts are instances that sit within your public subnet and are typically accessed using SSH or RDP. Once remote connectivity has been established with the bastion host, it then acts as a ‘jump’ server, allowing you to use SSH or RDP to log in to other instances (within private subnets) deeper within your VPC.
Set Up VPC in AWS
The first thing we want to setup is to have a VPC with internet gateway, route tables, multiple subnets in different availability zones, some of them are public subnet, the others are private subnet. We’ll leave NAT Gateway, Bastion Host, NACL to the next steps.
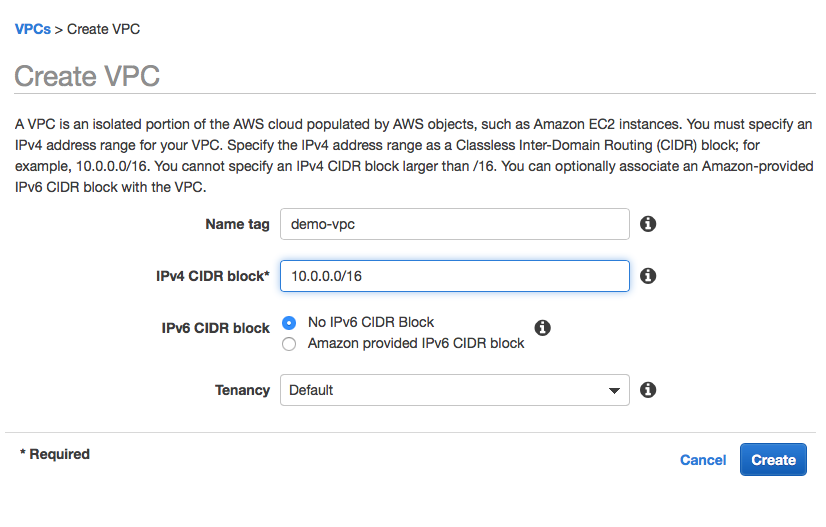
Step 1: Go to the VPC dashboard - Your VPCs, create a new VPC (give it an identifiable name)
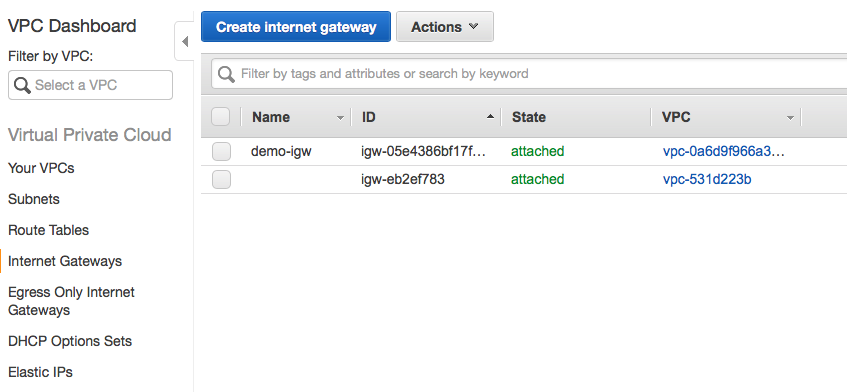
Step 2: Click on Internet Gateway from the left menu, create a new internet gateway, after creation, remember to attach it to the new VPC you created earlier (demo-vpc)
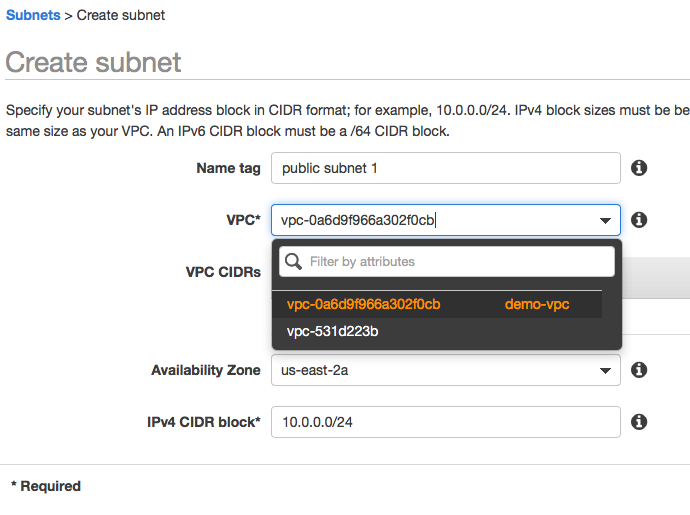
Step 3: Go to Subnets tab, create 4 subnets, give them names such as public subnet 1, private subnet 1(availability zone 1), public subnet 2, private subnet 2(availability zone 2), just to make it easier to identify them, since we will put them in different availability zones. (You can differentiate public subnet and private subnet by using 10.0.X.0/24 as public subnet, and using 10.0.10X.0/24 for private subnet)
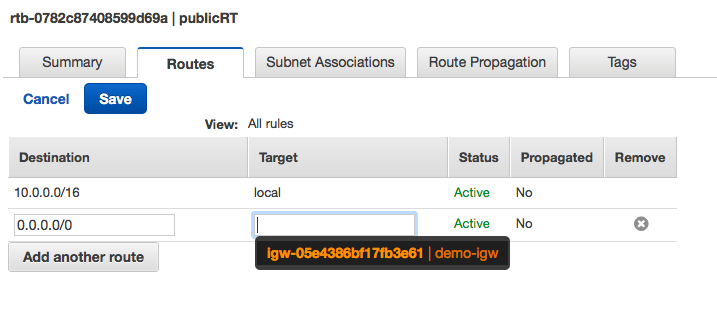
Step 4: Go to Route Tables We will create the first route table named PublicRT, this route table will be connected to Internet Gateway for open internet access.
We will create another route table named PrivateRT for the private subnets, for now, since we don’t want to allow public access for private subnets, we don’t need to do anything for the privateRT.
Step 5: Associate Subnets to Route Table Associate public subnets with publicRT, associate private subnets with privateRT.
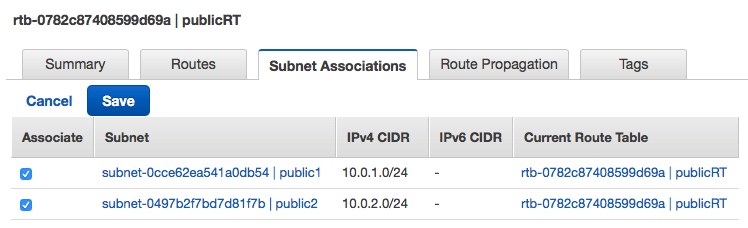
Now we have a VPC with Route Tables for public subnets and private subnets in different availability zones.
Add NAT Gateway
Since the private subnets instances, we don’t want them to be visible to the open internet, but we want these instance to be able to access the internet to install softwares:
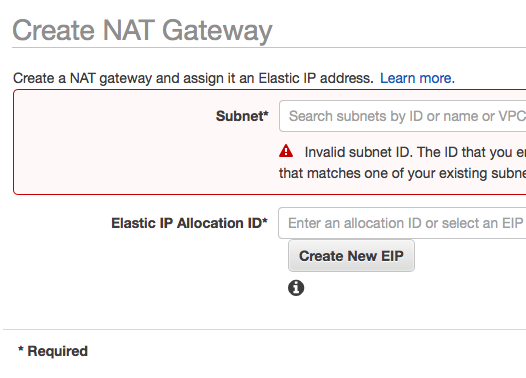
Step 1: Go to NAT Gateway on the left nav, create a new NAT gateway Note that we want to put this NAT gateway in a public subnet, click on create new EIP.
Step 2: connect NAT Gateway with the privateRT We will add the new NAT gateway to our private subnets’ route tables, it’s similar to adding a internet gateway in a public RT, just remember to select the NAT gateway in the PrivateRT.
Add Security Groups
We haven’t added the Bastion Host or the database instance yet, but we can create security groups here all together. The security groups we need to add are: 1) Bastion Servers 2) Web Servers 3) Database Servers
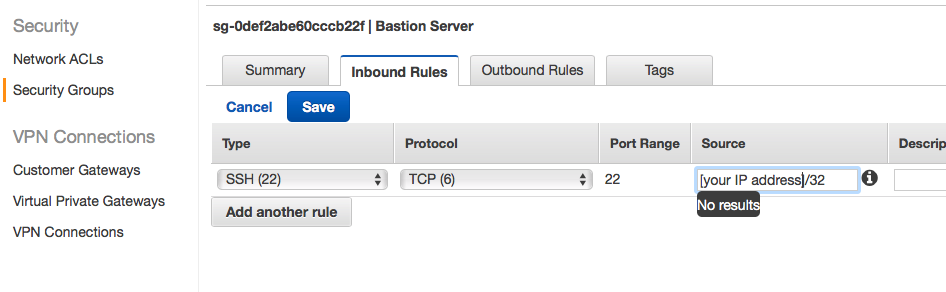
Step 1: Bastion security group
We want to add more security for the bastion host since it will open for the internet and is able to connect to private subnet. We will only open ssh port 22 and only allow connections from certain IP address.
Step 2: Database security group we only want the webserver and bastion host server to be able to connect to the database(I am using postgres here)
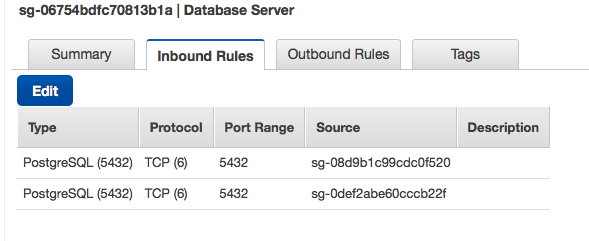
Since web server is public, no need to configure web server security group now.
Next steps
- Start a simple rails application with ElasticBeanStalk.
- Create a RDS instance
- Start a Bastion host
- Create database in the RDS instance via Bastion host