What I learned from building a React Native iOS app - Part 2
After I finished the most of the app, I started to search iOS app checklist because I know so many things need to be done before you submit your iOS app to the app store.
I used this checklist as a reference, but since I am an independent developer, I mainly need to focus on these things below:
Apple Developer Membership, Credentials and IPA file
Getting the Apple Developer Membership is straightforward so I’ll skip to the credentials. I was using the testing/demo xcode setting while I was implementing the app and that’s totally fine, but if you want to publish the app on App Store, you have to use a valid credential.
Unfortunately I didn’t take note of what I did, so I don’t have the step by step instructions here, but as far as I can remember, the basic steps are: 1) create an unique bundle id, something like com.mystuff.www, similar to Java package name 2) Create provision files (using that bundle id), I created one as Distribution provision another one as Development provision. Then go to the Xcode info.plist, update info such as Display Name, Bundle Identifier, Version, Build, and I used manually signing, so I use development provision file for debug and distribution provision file for release signing. You can test if it’s working by building it again(better clean the project before rebuild)
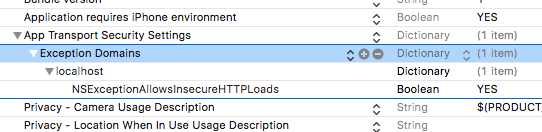
To generate IPA file, just follow the official doc, and don’t forget to change the NSExceptionDomains to build the IPA file (you also need to put it back if you need to change things later)
Icons, Splashscreen, Screenshots
I used Sketch for all the app icon, in-app icon, and the Splashscreen, I am not an expert in design so I didn’t want to spend too much time debating with myself which icon is better, the principle is as simple as it can be. This tutorial helped on the steps. I finished all the ui material in one or two hours.
My experience with Sketch is that it’s very intuitive, and you can mirror the design on mobile devices, slicing and exporting is so much easier.
If you want to publish the app in app store, you have to provide screenshots(and videos if you want) and descriptions. At first I thought it’s gonna take me a few hours to prepare the screenshots material, but it turns out that there are multiple third party services make this step a simple drag and drop, such as the applaunchpad, all you need to do is to upload the raw screenshots from your phone, upload them and add text to different screenshots.
Permissions and Offline detection
After (almost) everything is ready, I started some testing. Then I realized I totally forgot the scenario when there is no internet connection, this app needs to send request to get the waste wizard data when it loads the first screen, so I need to let user know this app doesn’t work without network connection. Then I added netinfo detection on the home screen.
Another thing I realized is that there was no logic to handle the scenario when user declined the camera/photo library permission, because iOS native will only ask user once if they want to grant permission, if user declined the first time they can’t give it permission again. So I used react-native-permission to add more control on the permission status: if user doesn’t give permission, the camera screen will be basically a menu where user can grant permission again.
But to pass the app store review using this lib, you need to add all the usage description key string value in info.plist, even if you don’t use them, you will get an email from Apple says this app is Missing Info.plist key, once you change the info.plist, update the Build number, archive another ipa file, then upload it again
Testing, Submit for Review
Once the ipa file, descriptions, screenshots (some times icon depends which xcode version you are using) are ready, you can select which country to publish the app, and the price etc. Mine is a free app with no in app purchase so nothing complex here.
I also used Testflight to add some test users, then I submitted the app, the review only took one day, which is surprising to me because I’ve heard people talking about you have to wait a long time for the review.
That’s how Recycle Wizard is made! :)
Install archived ipa file on connected devices
There is a way to export ipa and use iTunes to install on connected device, but for me it slows my laptop down whenever I open iTunes, I prefer another way: In Xcode, select Window -> Devices and Simulators, then just use the + icon to select ipa file to add.